Wing Foil Zanzibar
WING SURFING LESSONS IN ZANZIBAR
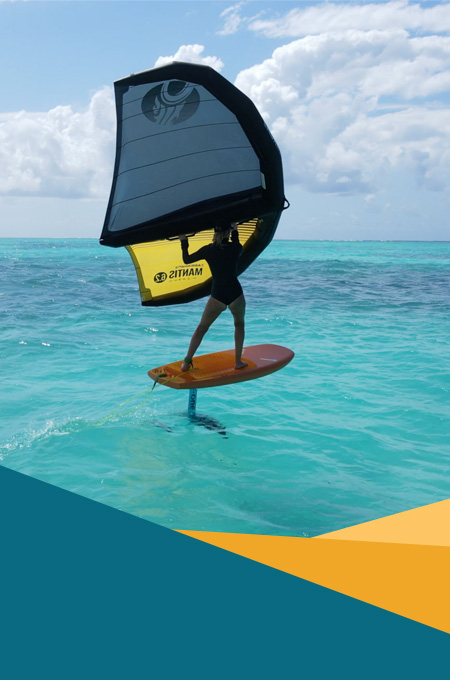
Wing Surfing is the newest craze in watersports and Kite N’ Surf is gladly welcoming you to the fad! Wing Surfing lessons in Zanzibar are for anyone – literally for anyone who just wants to try! We offer courses suitable for beginners, intermediate and experts of all ages. Our Wing Surfing lessons in Zanzibar provide you with the newest gears from our partner brands – Cabrinha, Takuma, and Fone, being updated every season to make sure your learning will be fun and easy!

| DURATION | PRICE (USD) | |
|---|---|---|
|
2 HRS |
167 |
|
|
4 HRS |
318 |
|
|
6 HRS |
453 |
+ 2 hours free rental |
INTRODUCTION TO WING SURFING
In this course, you will be matched to a professional instructor who will customize the lesson to pair with your individual style of learning. You will be taught the basic introductory lesson from safety, set up, launching, and landing. This course is available for Private Lessons, but in case you want to learn together with your families and friends, Group lessons are available and our instructors will give it the best shot. This course is a great way to get an introduction to Wing Surfing.
WHAT YOU WILL LEARN:
• Wing Setup
• Wing control
• Wind window theory
• How to determine if a wing spot is safe
• Wing control common mistakes
• Wing surfing safety
• Getting on the board and making your first rides
FULL WINGSURF COURSE
To complete the windsurfing course, students take a series of lessons totaling 10 hours. With this approach, you’ll be able to improve your skills in no time! In our experience, it takes about ten hours for a student to gain enough confidence to wingsurf independently.
WHAT YOU WILL LEARN:
- Wing Setup
- Wing control
- Wind window theory
- How to determine if a wing spot is safe
- Wing control common mistakes
- Wing surfing safety
- Getting on the board and making your first rides
- Body dragging cross wind (essential for board recovery)
- Riding up wind (Going and coming back in the same location you started from)
- Engaging the foil and start flying
PROGRESSION
The wing foil progression course is a tailor-made course that is specifically geared towards students who already have experience in the sport or they just had a few lessons previously and want to improve their riding skills. It is for those who wish to continue their wing surf course from where they left off or develop new skills from their current level. This course is even perfect for those learning to ride on the foil, tack, jibe, and even tuning their upwind technique.
WINGSURFING DISCOVERY COURSE
The course is 2 hours long, perfect for those who are still uncertain to commit to the full course. Anyone may take this course, allowing everyone to experience the magical adventure of this sport.
WING SURFING LESSONS SECTIONS IN ZANZIBAR:
WING AND BOARD SETUP
To start the wing surfing lesson, we need to learn how to set up the wing and the board. We begin with checking the direction of the winds, by standing on our back to the wind and laying down the wing in front of us. The most important part is we need to completely spread the wing before we start pumping. For pumping, we should use our legs, not our arms or our lower back after we connect the pump hose to the wing inflate valve.
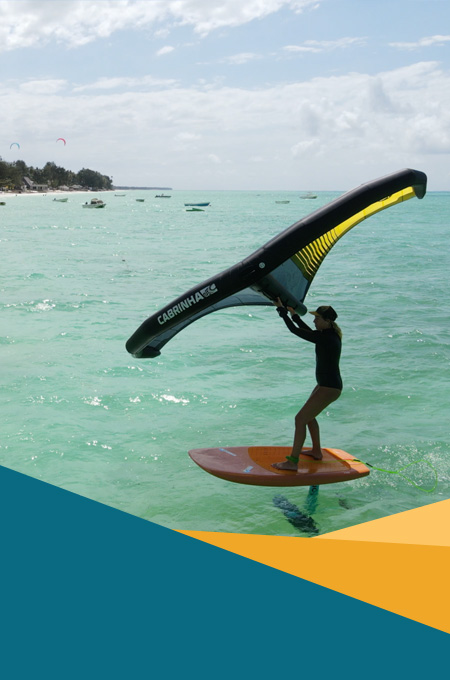
Wings have different models thus have different ways how to inflate them. Although most of these wings have the leading edge connected to the struts, Cabrinha wing X2 has a separate inflate valve for the strut making it fast to inflate and reach higher pressure up to 11 PSI for more stiffness in the wing and responsiveness when riding.
Recommended pressure labels are written next to the inflate valve. For Cabrinha Mantis, we pump it up to 5.5 PSI, and for the Cabrinha Wing X2, leading-edge inflate pressure is 5.5 PSI while the strut inflates pressure is 11 PSI.
FLIPPING THE WING
One of the core skills that you need to practice is flipping the wing. Though practicing it on land may be different on the actual water, you need to get used to maneuvering the wing to flip over and land belly up, as this will be the case when you fall on the water.
Flipping the wing has two methods. The first one is while standing, it is easiest to hold the wing by the power handle (leading edge handle) in front/above your head and use your free hand to push down on the leading edge. The second method is grabbing the wingtip, then bringing the wing into the air and flipping it over. Once you are comfortable with these movements, try flipping the wing on your knees, and then in a seated position. Even though it is easier to flip the wing while standing, in the water you will most likely be on your knees or seated on your board when flipping the wing.
Remember: The bigger the wings, the harder it is to flip. The Wing Span is a common issue in places with lighter wind conditions as it requires bigger wing sizes for heavier riders, sometimes even up to 8 m2 wings. The board’s size has an influence on the ability to flip the wing as smaller boards tend to make it harder to flip the wing due to the instability of the boards.
WING CONTROL AND HANDS MOVEMENTS
Having control over the wings and switching hands. When you hold the wing from the leading edge handle, the wing will float in the air – even without any pull. This is the feathering position that you will use to carry the wing on the board and as soon as you board on the water.
Then you will hold the wing from the bottom handles without pulling on any of the handles. This is the position you want to keep your wing at in order to depower your wing before you start riding or when you are on the water and you feel overpowered.
Though it may seem easy, be careful not to pull because even a small pull with your bottom hand will make the wing catch winds and pull you forward. Keep the wing above your head and practice switching hands while focusing on keeping the wing in a depowered state.
WALKING THE WING
During this phase, we will build your sense of orientation based on the wind direction by walking with the wing on the beach.
Begin this by deciding which hand to hold the wing. In case you want to walk left (Ride left when on the water) you will grab the leading edge handle with your right hand and your left hand will reach the front handle and you will reach to the back handle with the right hand. Always hold the wing from the front handle first to move in the neutral position.
Maintaining the neutral position, we start to tilt the wing slightly to the direction where we are walking. During this phase, we start to get a feeling of the power and the pull from the wing by pulling and releasing on the back handle. To switch direction, we move the wing into the neutral position again by holding the wing from the leading edge handle (left hand in this case) and you grab the front handle with the right hand then the left hand on the back handle.
We tilt the wing slightly to the right and then we start walking. The more time we spend practicing the wing control on the beach the faster it will progress on the water and that’s the main reason that we try to practice as much as we can on the beach.
One of the most common problems that happen when on the water riding is the wingtip (bottom corner of the wing) tends to hit the water and we react to that by pulling with both hands to lift it up, this will make the wing generates more power and to generate a greater pull then the wing ends up pulling us very hard so we lose control on it and in that case we need to let go on it.
To avoid that from happening we need to practice pushing down with the backhand and this is the most important technique that you can learn for wing control as it makes the difference between riding and dropping the wing and falling off the board.
HOW TO CARRY THE WING AND THE BOARD TO THE WATER
Easiest to practice yet can be frustrating. Make sure to practice this skill, in the beginning, to save you from struggling in carrying your wing at the beach.
Start by carrying your wing by holding the leading edge handle, with the center strut facing the ground the wing will float carried by the wind. Try to avoid carrying the wing with the center strut facing the sky as the wing will be harder to control. While walking upwind (toward the wind) it is easiest to hold the wing over your shoulder and let it fly behind you.
In a crosswind, a situation holds the wing downwind of you so it floats next to you. When you eventually must carry your wing and board, it is best to keep the wing downwind and the foil upwind of you as if you do it the other way around the wing will tend to hit the board and tend to get damaged by the foil.s
TIPS AND TRICKS
Now that you’ve learned the basics of how to operate a wingsurf foil, it’s time to hit the water! Let’s go ahead:
- It is important that we know when we should get inside the water. When you start wing boarding you will tend to drift downwind. The important part of the game is walking back to the launching point. This will improve when you manage to ride upwind.
- Make sure you have already the wing leash connected to your wrist and the board leash connected to your foot or waist in case of waist leash usage. Let go on the wing and get on the board on your chest, paddle away from the shore if it’s required and to avoid the shallow water.
- Starting with your knees keeps you stable whilst you get the hang of the wing.
- You need to get it into the correct flying position before you start as the wing may lay upside down when you get on the board or after you fall off your board it might flip upside down. Just like what you practice, you start by holding the wing from the front handle.
- Position the wing above your head starting on your knees and grab the Wing by the inner handles. Remember if you are riding left to have your left hand on the first handle and the right hand on the second handle, and pull gently on the back handle to capture the wind.
- Stand up one foot at a time– once you have some speed, begin by standing with your front foot first (riding left requires you to have the left foot in the front). Once you’re standing with both feet you can position yourself into the riding position.
- How to go upwind with the wingsurf
To avoid going downwind there are two important things to keep in mind all time you will have to push more on your back foot and this should be done at the same time when pulling with the back handle
- What should I do to have more balance when wing foiling
We recommend that you position your feet on opposite edges of the board and not on the same edge as this will help to distribute your weight on the board and will improve your balance.
During this phase, you will tend to drift downwind, fall off the board, and lose control of the wing many times! Don’t worry it’s just part of the learning process and you will manage to ride upwind, start to control the wing properly, and avoid falling down the board by building the right muscle memory.
Start flying: after a few hours spent on the water riding upwind, it starts to feel natural the need to start engaging the foil. Until now we were not engaging the foil and we were trying to understand the wing control and the board control under our feet. Engaging the foil requires some understanding of how the lift from the foil works.